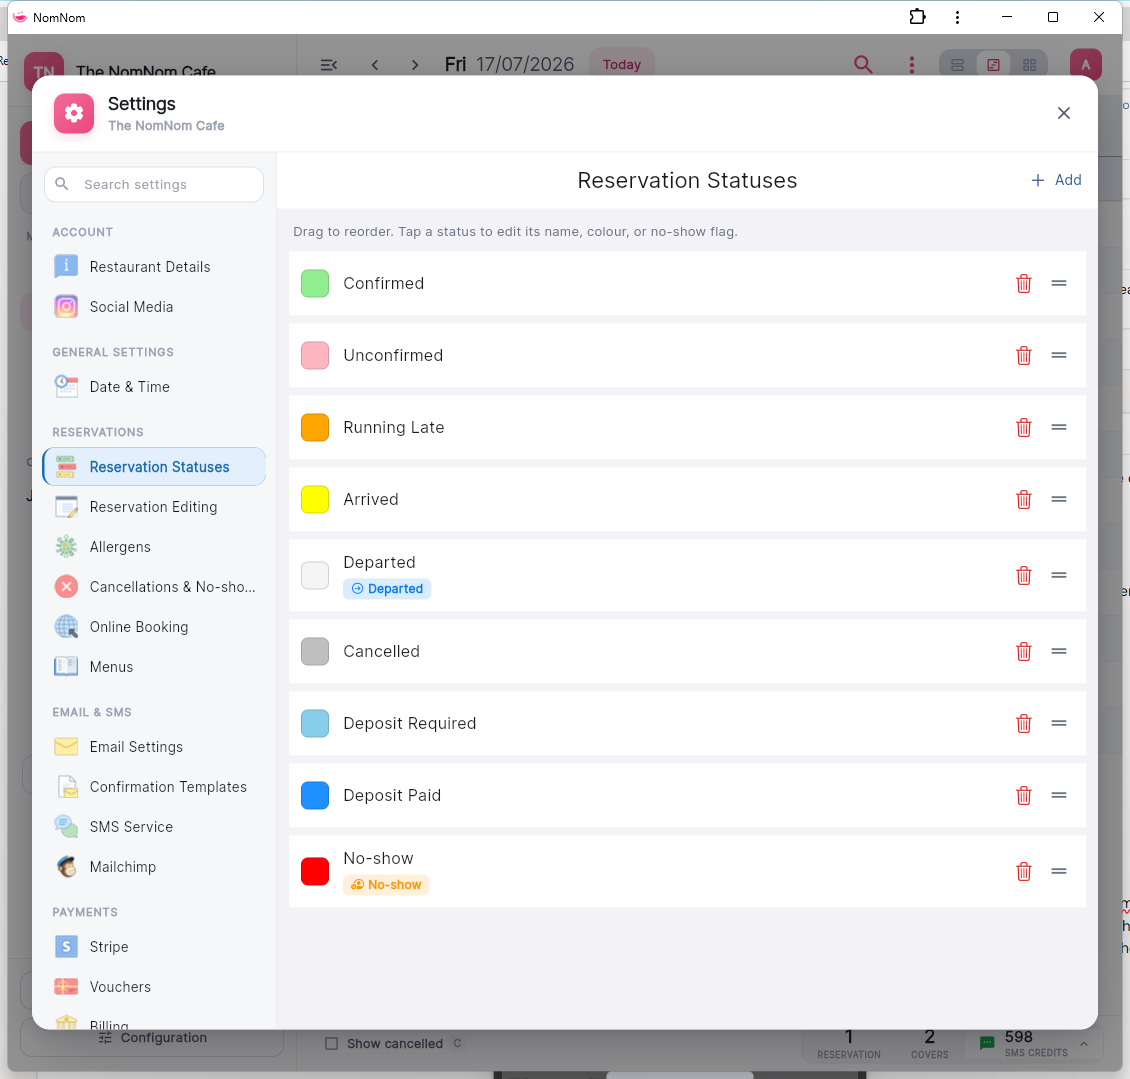
Booking statuses — Confirmed, Arrived, and so on — are yours to shape in NomNom Web. You can rename them, change their colours, reorder them, delete ones you never use, and add your own, so the list matches the way your restaurant actually runs.
Find your statuses
Open the account menu in the top-right corner, choose Settings, and select Reservation Statuses. You'll see your current list, in the order it appears when your team changes a booking's status.
In NomNom Web: open the account menu (top-right) → Settings → Reservation Statuses.
On the mobile app: statuses live under Settings → Statuses.
Add or edit a status
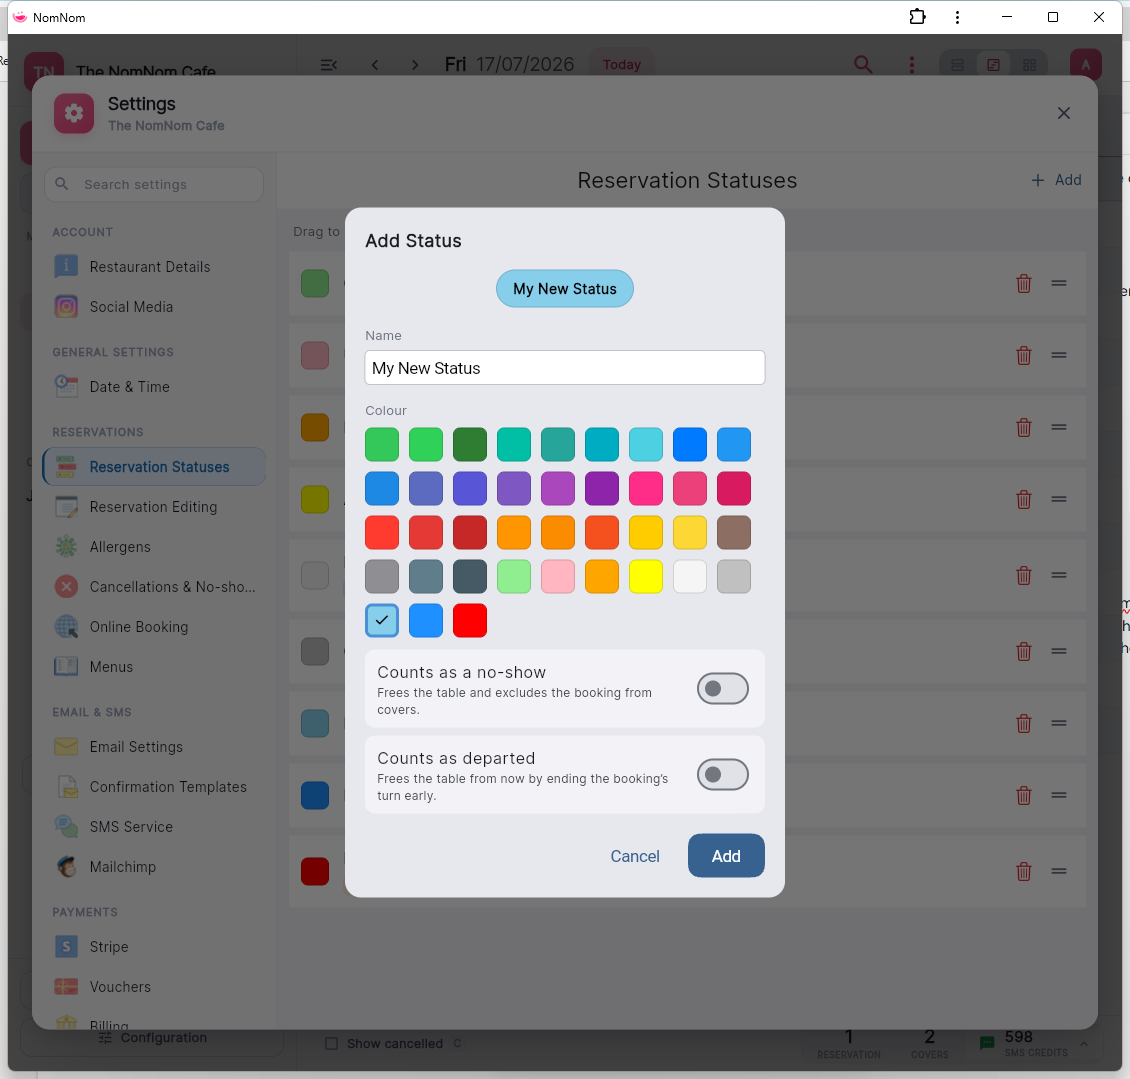
Use the add control to create a new status, or select an existing one to edit it. Each status has:
- A name — whatever makes sense to your team.
- A colour — pick from the palette; this is the colour the booking shows in your List, Chart and Plan views.
- Counts as no-show — treat bookings given this status as no-shows: the table is freed up and the booking is handled like a no-show throughout NomNom Web.
- Counts as departed — for statuses that mean the party has left. Marking a seated booking with a departed status ends its turn there and then, so the table immediately becomes available to book again. The booking keeps its table and guest numbers for your records. If you change the status back (a mis-click, say), the booking gets its standard turn length back.
Reorder and delete
Drag statuses up and down to set the order your team sees. Delete a status you no longer want — you'll be asked to confirm first.
Good to know
Renaming or deleting a status doesn't relabel bookings that already have it — they keep the text they were given, so your history stays accurate.