Before you can take bookings, NomNom needs to know about your seating areas and the tables in them. Everything here lives on the Configuration screen, and you can set it up at whatever pace suits you — add a single area to get going, or map out your whole floor in one sitting.
To get there: open the menu (the icon in the top-left), then tap Configuration. The screen has tabs along the bottom — the two you'll use here are Areas and Tables.
Step 1 — Add your areas
Areas are your seating spaces — a dining room, a bar, a terrace, and so on. (You may see them referred to as rooms in a few places; they're the same thing.) Start on the Areas tab, where the header reads Areas with the note Configure areas / rooms.
Tap Edit in the top-right to open the Manage Areas panel. From there you can:
- Tap Add Area to add one — you can pick a suggested name or choose Other (custom name)… to type your own.
- Use the pencil icon to rename an area, or the bin icon to delete one.
- Drag the handle on the right to reorder areas into the order you prefer.
When you're happy, tap Done. There's no rush — you can always come back and add more later.
In the app: Configuration → Areas.

Step 2 — Decide which areas take online bookings
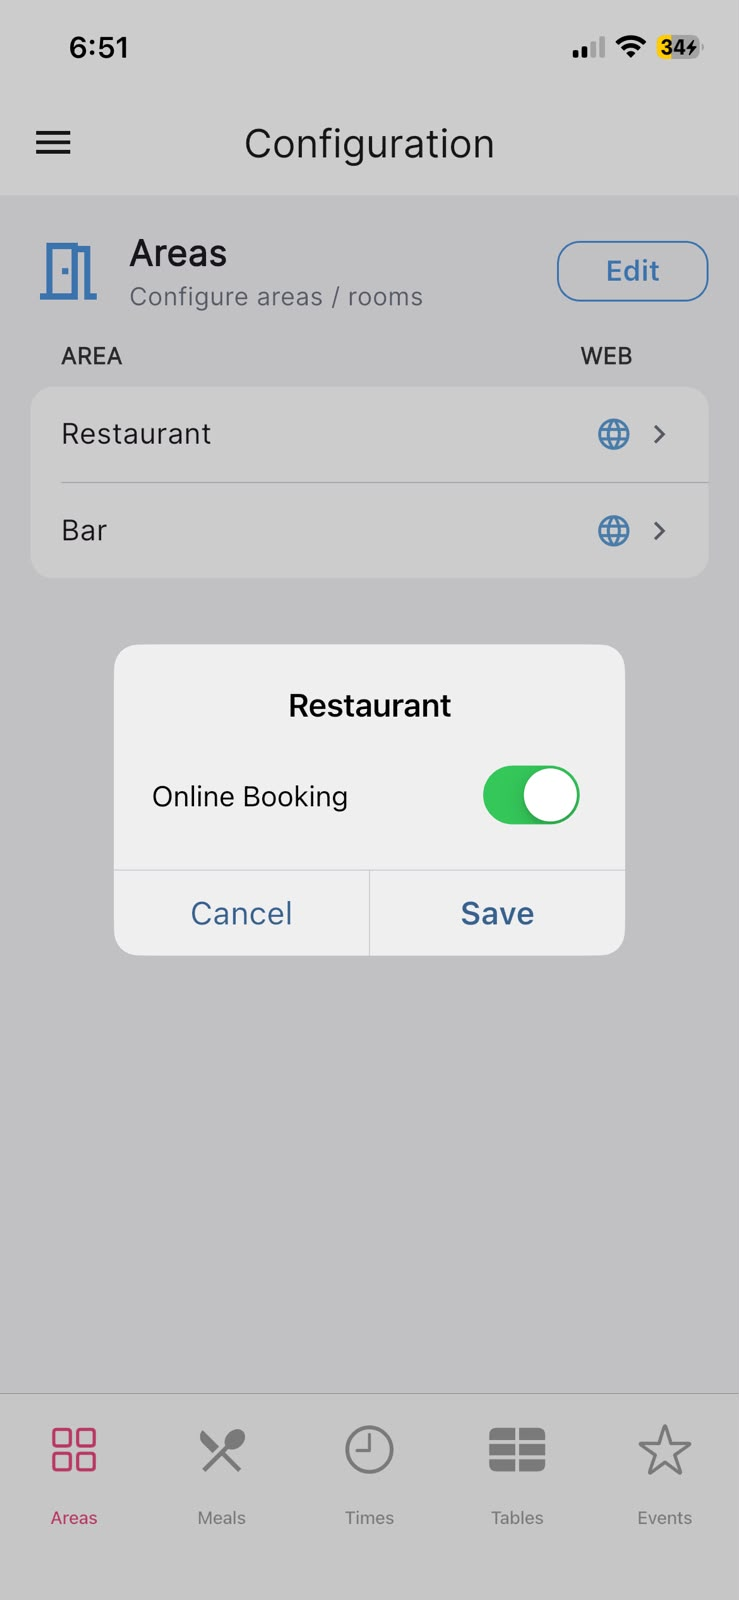
Back on the Areas tab, tap any area in the list to open its details. There you'll find an Online Booking switch — turn it on if you'd like that area offered to guests booking through your website, or leave it off to keep it for in-house use. Tap Save when done.
Areas that are open to online booking show a small globe icon in the list, under the WEB column.
In the app: Configuration → Areas.
Step 3 — Add tables to an area
Switch to the Tables tab — its header reads Tables with the note Add tables and groups. If you have more than one area, a selector across the top lets you choose which area you're working in.
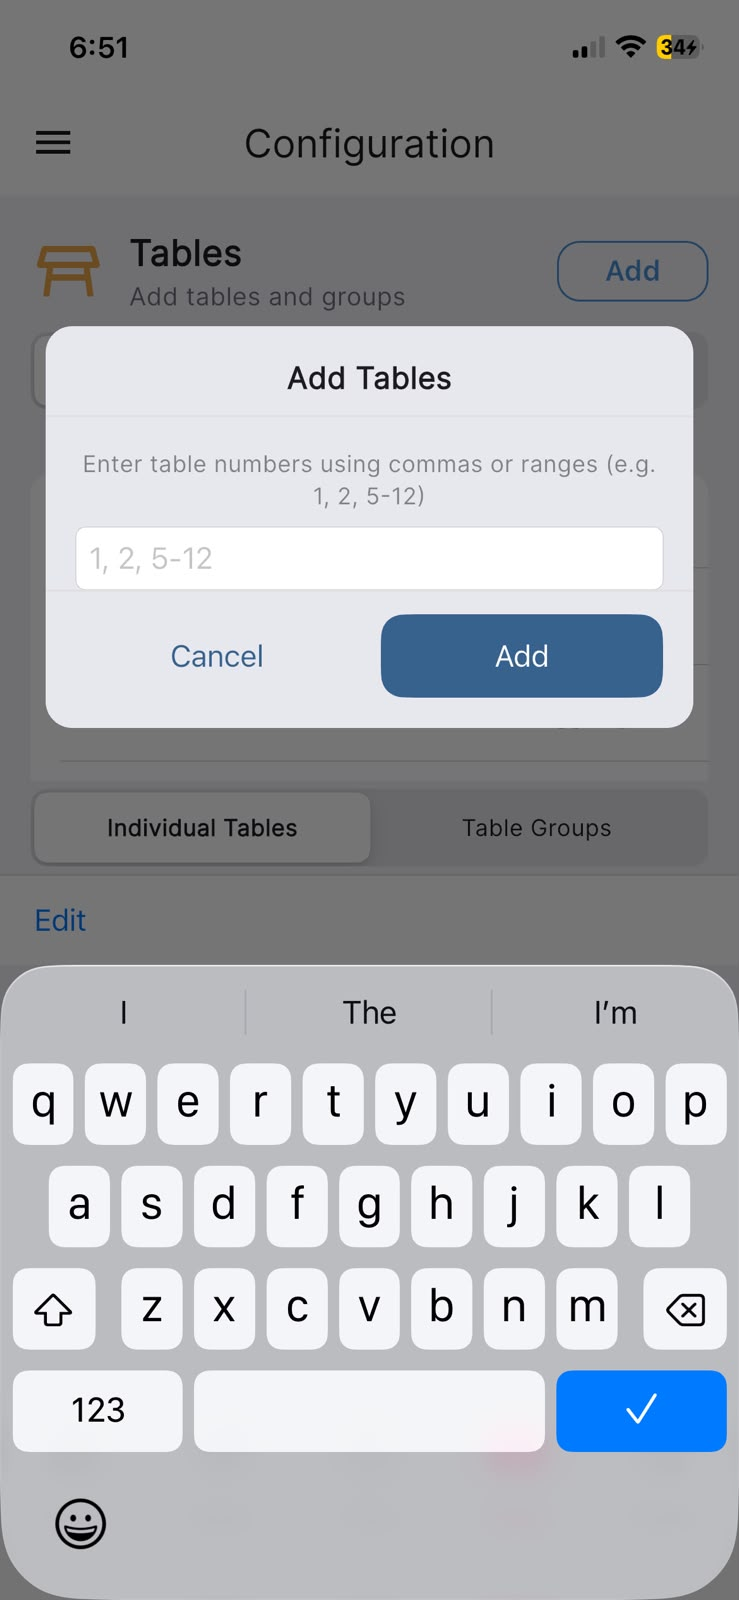
Tap Add, then choose Add Tables. You can enter several tables at once — type the numbers separated by commas, or use a range. The on-screen hint shows the format: Enter table numbers using commas or ranges (e.g. 1, 2, 5-12). Tap Add to create them. New tables start with a default size of 2 guests and online booking on, which you can adjust next.
In the app: Configuration → Tables.
Step 4 — Set a table's capacity, online status, and dog-friendly flag
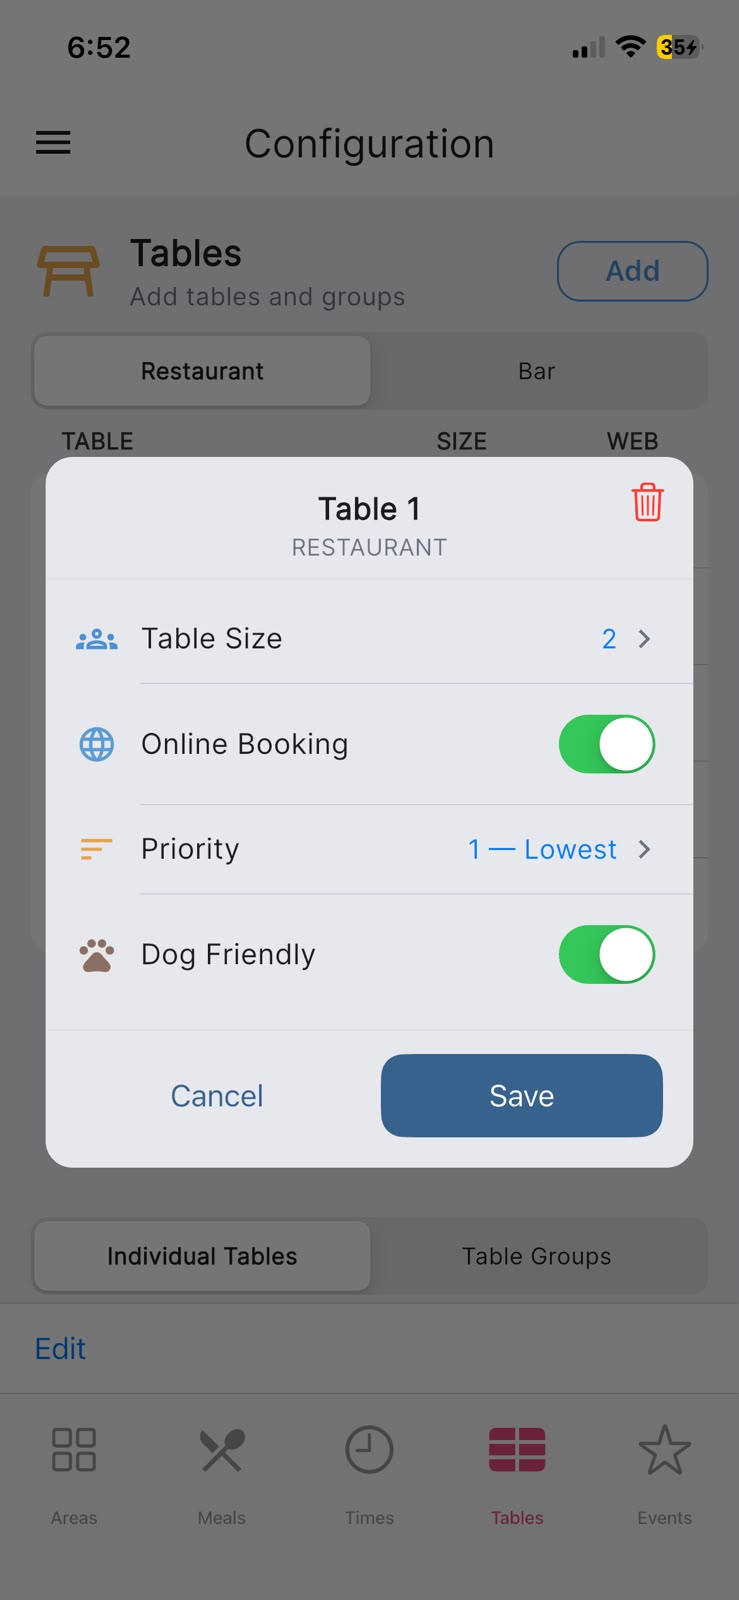
On the Tables tab, tap any table to open its details. Here you can set:
- Table Size — how many guests the table seats.
- Online Booking — whether guests can book this table through your website.
- Priority — higher-priority tables are offered first when the app looks for availability.
- Dog Friendly — turn this on for tables where guests may bring a dog.
Tap Save to keep your changes. In the table list, the SIZE column shows each table's capacity, while the WEB column carries the status icons — a paw icon marks dog-friendly tables and a globe icon marks tables open to online booking.
In the app: Configuration → Tables.
Step 5 — Group tables that can join together
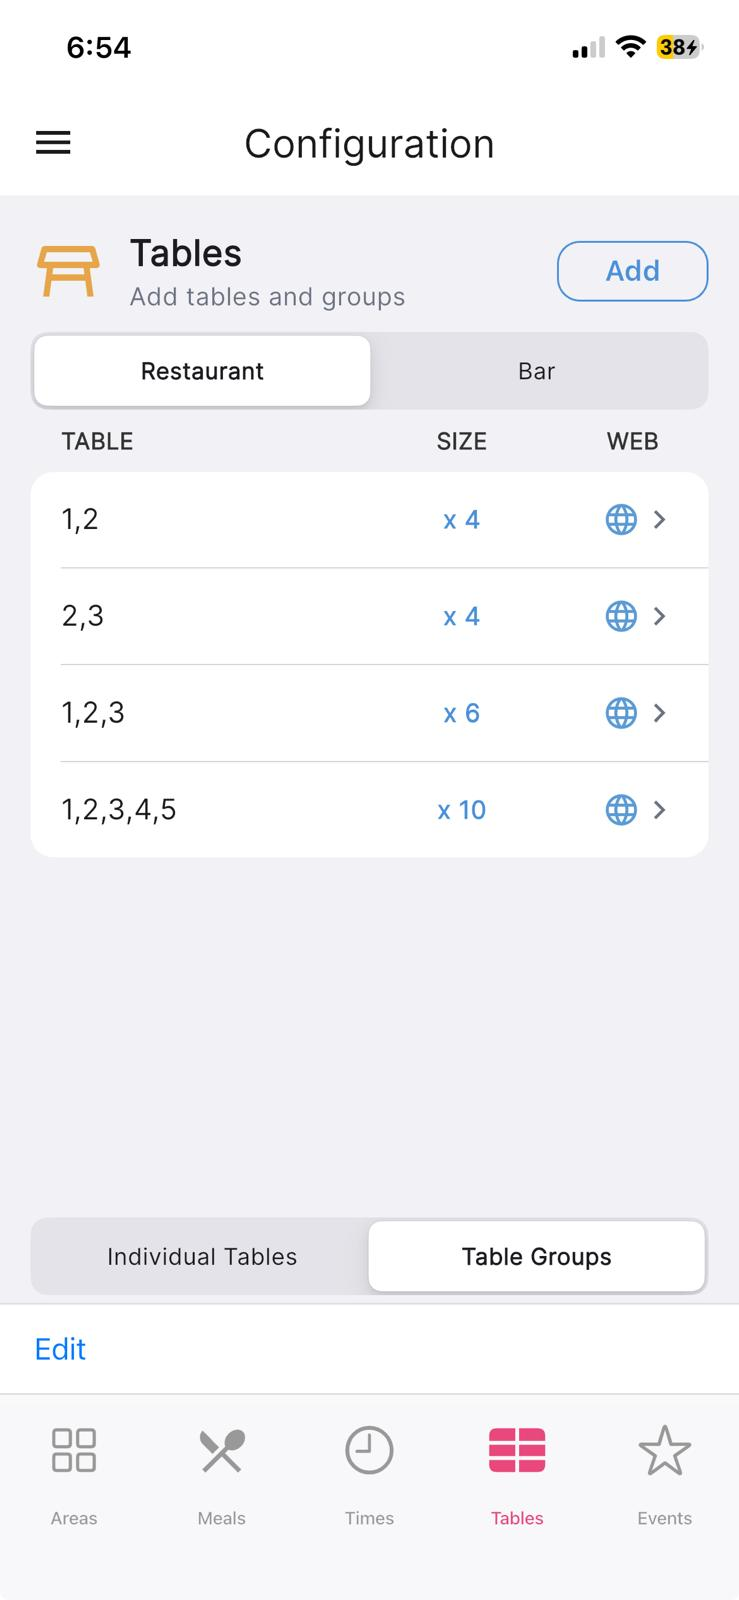
If two or more tables can be pushed together for a larger party, you can set that up as a table group. On the Tables tab, tap Add and choose Create Table Group. On the Select Tables screen, tick two or more tables (the hint reads Select 2 or more tables to create a group), then tap the button to continue. You'll then see the same details screen as a single table, where the group's combined capacity is filled in for you to confirm.
Once created, switch the list at the bottom of the Tables tab from Individual Tables to Table Groups to see your groups.
In the app: Configuration → Tables.
A quick tip — editing several tables at once
If you'd like to change many tables together, tap Edit in the toolbar at the bottom of the Tables tab. Tick the tables you want, use Select to select all or none, then Modify to apply a change — such as enabling or disabling web booking, or setting a table size or priority across them all. You can also Delete selected tables from here. Tap Done when you've finished. It's entirely optional, but it's a handy shortcut when you're setting up a lot of tables.
In the app: Configuration → Tables.