Meals are the services you offer — lunch, dinner, brunch, and anything in between — and times are the slots guests can book within them. Both live on the Configuration screen, and you can set them up in any order that suits you.
Add your meals
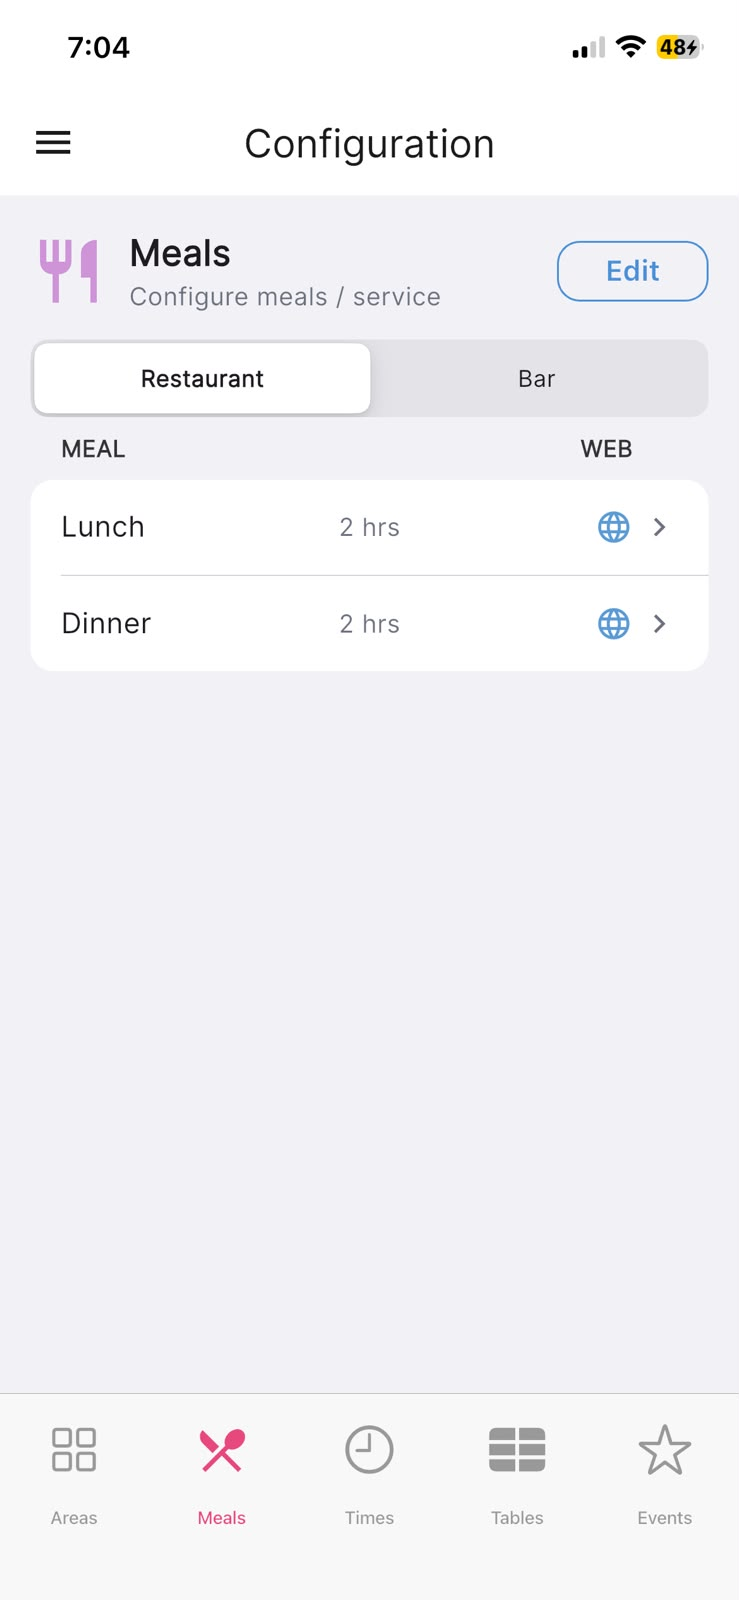
Open the Meals tab to see the meals already set up. If you run more than one area, a row of buttons at the top lets you switch between them, so each area can have its own meals.
To add, rename or remove a meal, tap Edit in the top corner. You'll get a list where you can Add Meal (pick a suggestion such as lunch or dinner, or choose Other (custom name)… to type your own), and rename or delete any existing meal using the icons beside it. Tap Done when you're happy. Deleting a meal is gentle — existing reservations keep it, and its time-slots and deposit settings are saved so you can add it back later.
In the app: Configuration → Meals.
Set what each meal does
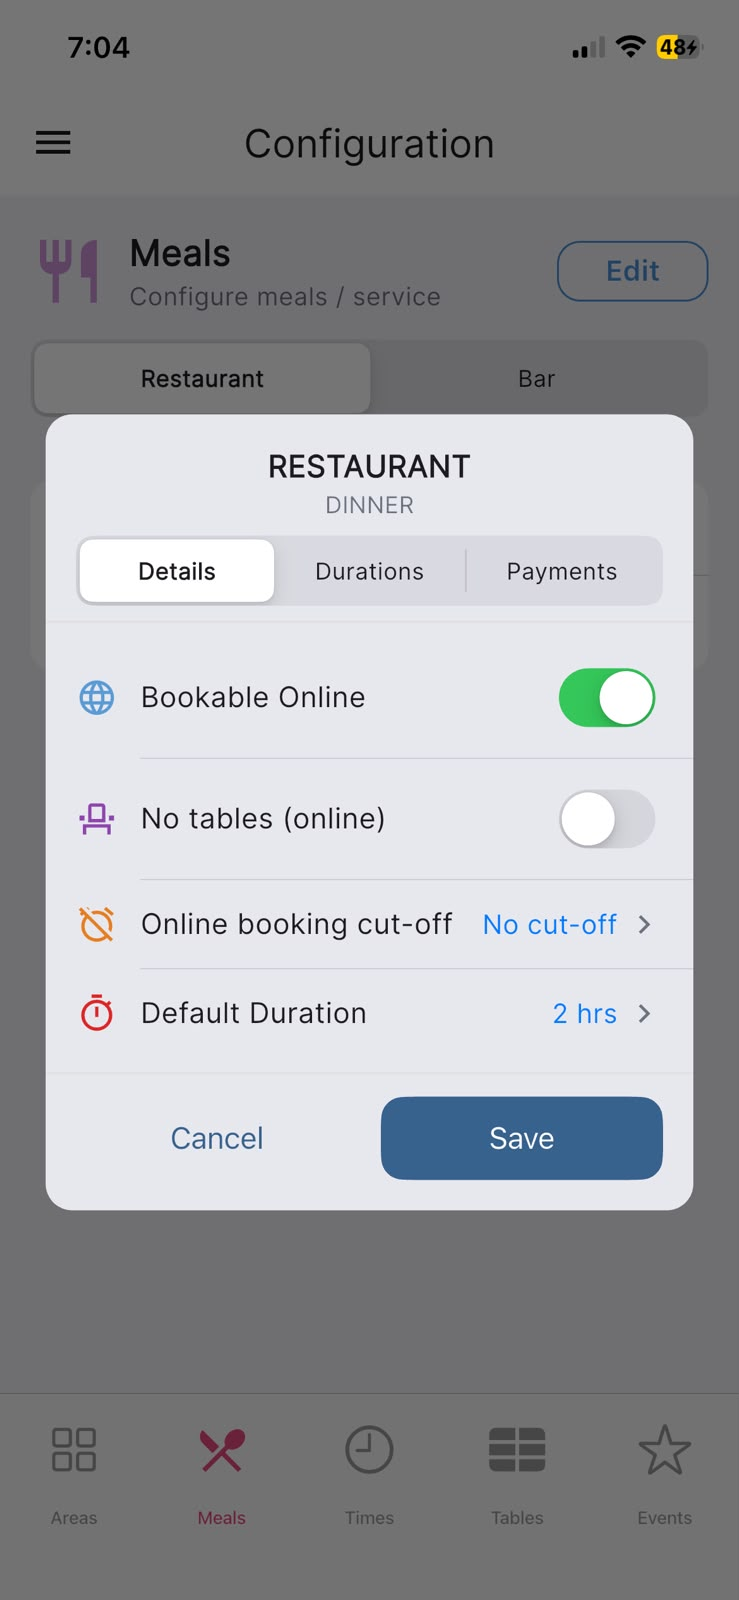
Tap any meal in the list to open its settings. There are three sections across the top — Details, Durations and Payments.
On Details you can turn on Bookable Online (so guests can book this meal from your website) and set the Default Duration — how long you'd like to hold a table for. When a meal is bookable online you'll also see Online booking cut-off, a same-day deadline after which the meal stops taking online bookings. The Durations section lets you set longer table times for larger parties if you'd like. When you've made your changes, tap Save.
In the app: Configuration → Meals → tap a meal → Details.
Add your booking times
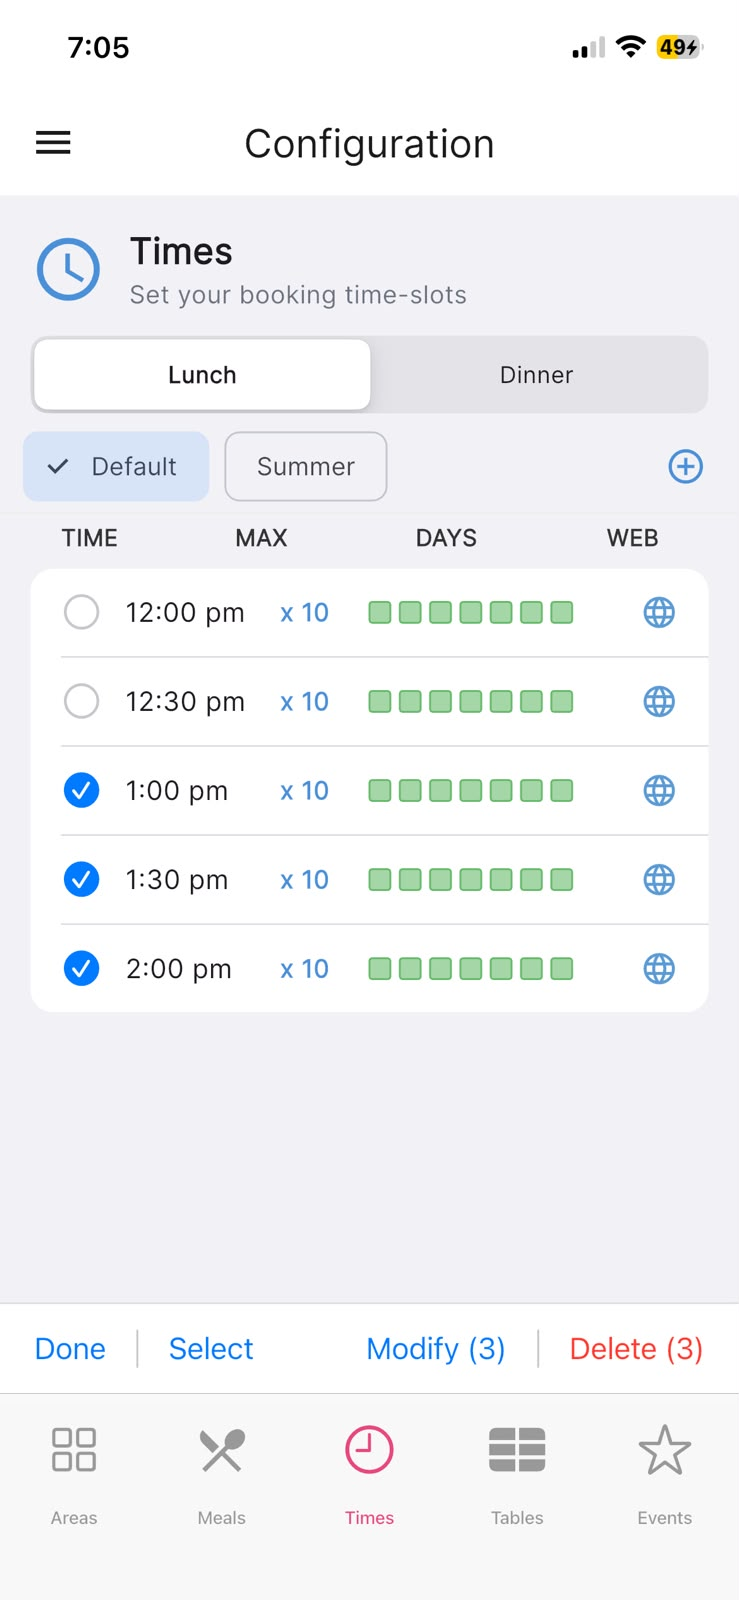
Open the Times tab. If you have more than one meal, the buttons near the top let you pick which meal you're setting times for. Each row shows the time, its max guests, the days it runs, and whether it's available online.
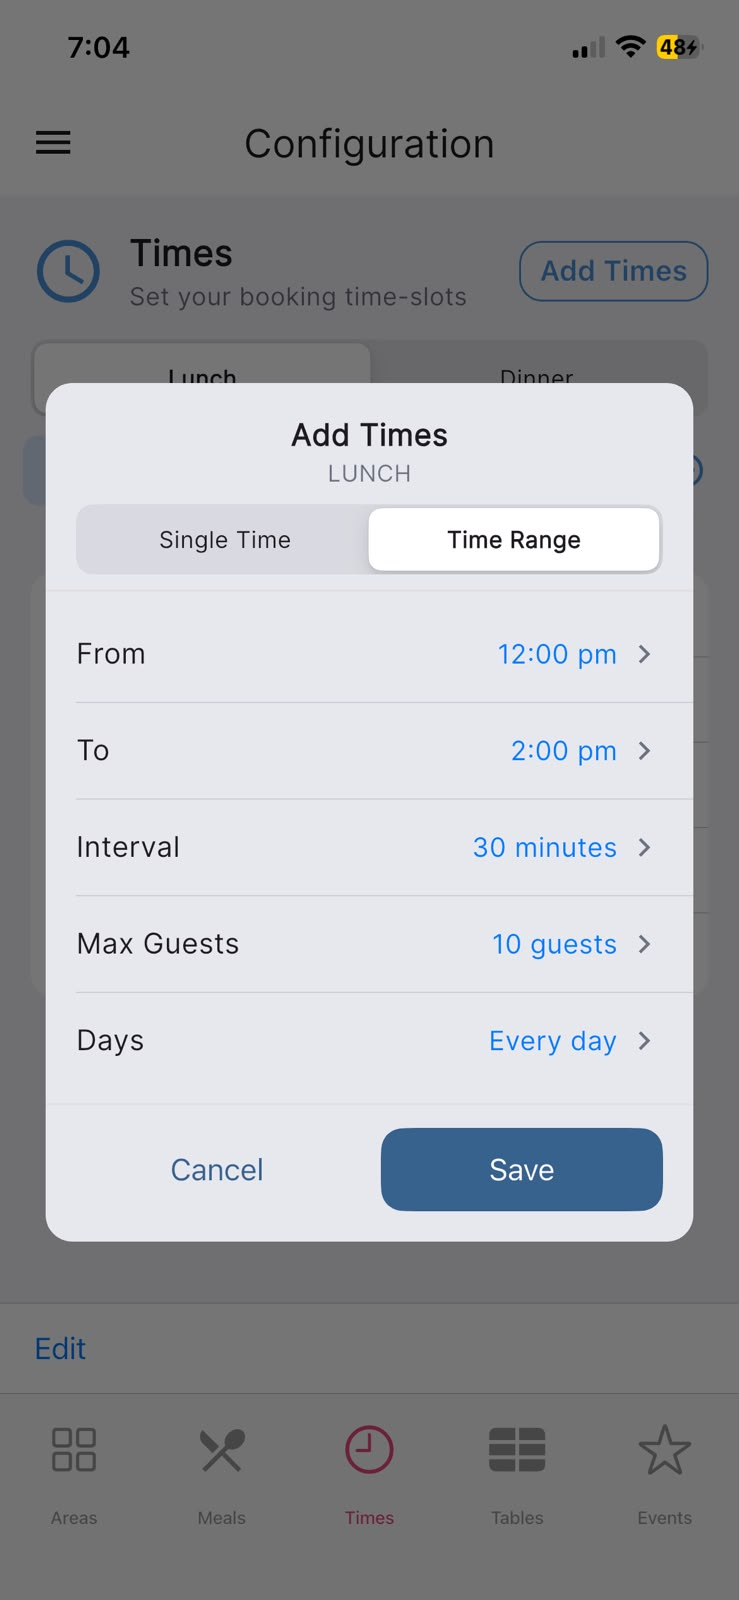
Tap Add Times to create slots. You can choose Add single time for one slot, or Add time range to generate several at once across a window. From there you set the time (or the From/To range and Interval), the Max Guests per slot, and the Days the slots should run on, then tap Save.
In the app: Configuration → Times → Add Times.
Adjust slots in bulk, and add seasonal lists
To change several slots together, tap Edit in the bottom toolbar, tick the slots you want (the Select button has handy Select All / Select None options), then tap Modify. From there you can Enable Web Booking or Disable Web Booking, Set Max Guests, or Enable for days / Disable for days. You can also remove slots with Delete. Tap Done to leave edit mode.
Above the list you'll see a Default chip alongside any seasonal time lists you've created. Use the add and edit icons next to it to keep separate sets of times for different seasons; whichever list you select is the one your changes below apply to.
In the app: Configuration → Times (bottom toolbar Edit, and the Default / season selector above the list).